

April 07, 2012
April 04, 2012


March 30, 2012
Patio Drapes - Yes Please...
A friend of mine asked me the other day what I thought of curtains outside. Without any hesitation I said YES!!! I love the cozy intimate feel it brings to a patio and they can actually become pretty useful. You can use them to block the sun or add a bit of privacy to your outdoor space.


My only suggestion was to make sure and use a fabric that is durable or made for the outdoors. While a nice interior fabric will look great chances are it won't last very long or hold up in the outside elements.
Here is some inspiration for my friend to help get her dear husband on board with the whole idea of hanging drapes in the patio room......

I know this is totally unrealistic but just to die for....

Even Pottery Barn is on the outside tract...

Alright lets get real. If you really want the husband on board you have got to look for ways to save the old Benjamin Franklins. Finding a cheaper way to experiment with curtains outside is a must, because lets be honest - who really has the money to throw outside. If I had a covered patio that was screaming for drapes I would find myself looking in the paint section at Home Depot for some drop cloths that are cheap, durable, and already hemmed. Ten bucks for a large panel - yes sir $10 buck a roos. Get a long metal pole (maybe from the fence section) to mount it to the patio. I tell you for around $100 bucks you could get a fabulous looking elegant patio......

Here are drop cloth drapes from the Letter Cottage blog....

Who would have thunk it!!!! Drop cloths??? Really.
Sigh - I want a covered patio now!!!
March 14, 2012
2 Months
Wowzers time really does fly by with kids. Michael is learning to coo and smile this month, and boy does he love it when you talk to him. He is sleeping 8 to 9 hours each night and has been doing this since 4 weeks. I do realize how lucky we are, and each night I put him to sleep I think to myself "is tonight the night my luck runs out?" but low and behold he wakes up around 7am laughing and smiling in his bed.

Here are his monthly pictures side by side.......

And a few more pictures of this month......


Baptism
February 28, 2012
Afraid of Color

I will be the first to admit that most of my projects are the brain child of someone a whole lot smarter and more talent than me but I love to have fun with these projects and ideas and run with them.
We learned that I am defiantly afraid of color. I like the warm muted soft colors and tend to steer clear of bright loud bold colors. With a little push from the husband saying that our kid will need some stimulation and color in his life I decided to embark on this colorful DIY project.

Colorful Paper Dot Mobile
List:
10 different colored cardstock of your choice
2" circle punch
small hole punch
200 pieces of 7 mm jump ring
8" embroidery hoop
6" embroidery hoop
Also need some needle nose pliers, fishing string, and a hot glue gun which I already had on hand. They had all the supplies I needed at Hobby Lobby.

1. Cutting circles: Used the 2" punch to cut out all the circles. I had 9 different colors: burnt orange, yellow, light yellow, dark blue, light blue, baby blue, green, light green, and cream. I did a cascade of colors starting dark and ending with a lighter colored on the bottom. You will need 4 strands for the outer hoop and 3 strands for the inner hoop. So cut out a total of 21 circles of each color.
2. Attaching the circles together: using your small hole punch make holes in the top and bottom of each 2" circle. For the top and bottom circle only punch one hole. Use the jump rings connect the circles making a strand of 9 circles which will total 21 strands (I did 7 of each color).
3. Hot glue the first circle onto the embroidery hoops spacing them about 1/4 inch apart. Your circles should barely be touching each other.
4. Cut 3 pieces of the fishing line about 4 inches in length. Then glue them to the inside of hoop to connect the smaller hoop to the larger hoop. Your small hoop should fit in the inside of the larger hoop and hang a few inches below it.
5. Tie fishing string to the large hoop in 4 different spots to hang it from a hook. I originally planned on hanging it from the ceiling but our ceilings are so high and it worked out that the shelve was near by to hang it from. I got a extended hook from the curtain section in Lowes and it worked great.


I finished this little project up on a rainy weekend while watching endless hours of a golf tournament with the husband. It sounds more complicated than it actually is, the outcome was well worth the time. The tedious part was connect each circle to each other with the jump rings. Michael LOVES the mobile and I debated on where to hang it - above the crib, rocking chair, or the changing table? The changing table won!!!
February 22, 2012
She's Got Legs
I am so in love with the console sinks with the chrome legs. They look so simple yet add so much elegance to these bathrooms. I dream of the day that we can buy an old house and slowly remodel each room with all the things I love. This sink would live right next to my claw foot tub or maybe an air tub???

(via domino magazine)

(via houzz.com)

(via decorpad.com)

(via decorpad.com)
February 21, 2012
Quote

Just keeping it real - this mommy stuff is hard (it's not for the faint of heart I tell you). Don't get me wrong I have moments of pure bliss and ecstasy and I feel so blessed and in love. But they are also mixed in with the moments your eyes rolling behind from being tired and the endless poop and feedings.
February 10, 2012
1 Month
I am going to try and take monthly pictures of Michael to see how much he is changing and growing his first year. I got this great idea from Young House Love to put him in a onesie and have different backgrounds each month. They did their little girl each week and they give an amazing step by step guide on how to do it all in photoshop. Check it out here.


Any who, it blew me away when I put his 0 months (1 week old) picture next to his 1 month picture. I guess I am with the little man all the time so I don't notice how much he is growing.....


Here are the pictures side by side....

Stay tuned for the upcoming months!!! How long you think I can keep this up? 1 year? Maybe till he goes to college?
O and here is a smile to brighten your weekend............

February 08, 2012
Before & After
I die for before and after pictures!! They are my absolute favorite because I am always amazed at what a little paint and imagination can accomplish. This my dear friends is probably the most dramatic B & A that has graced my sweet little blog.......


February 06, 2012
Because Today...
I am dreaming about the day I can fit into normal clothes again, and hoping that I can get some cute things like these to put on my body......


(via Pinterest)
I need those boots with that black dress.
Not want them, I NEED them.
February 02, 2012
Introducing Baby
One month in and I am slowly starting my entry back into the real world. SLOWLY I tell you because in all reality I can count on one hand how many times I have left my house the past 30 days. I even managed to get out of my pj's before 4pm today, most days I bathe and put the pj's right back on. But it's time, my energy level is up and Michael needs to start seeing this big bright world outside!!!!
One more picture to share with you guys of my little man. I know I have turned into one of those psycho parents that thinks the whole world wants to look at pictures of their kid. I saved the best for last!!!! By some strange miracle I got the birth announcements out in record breaking time. I took this picture of Britt holding Michael a week after he was born. I order them from Tiny Prints that same night (after some editing in Photoshop) and they literately showed up on my door step the next day. I addressed them over the weekend and voila.......

"For you created my inmost being; You knit me together in my mother's womb.
I praise you because I am fearfully and wonderfully made." Psalm 139:13-14
January 12, 2012
Michael Raymond
It's been 1 week and one of the most amazing weeks of my life. I was scared to death of the birthing process and my stay at the hospital. But all and all it was a great experience and I thank God for my husband being by my side for every moment. It truly is a miracle. Everything went smooth, and we all went home happy and healthy.
Tuesday morning I woke up not feeling myself, I called work and told them I would come into the office after lunch. I got in the shower at around 11am and started having contractions. I waited it out for a while and timed them 20 minutes apart. After an hour I decided to call Britt to come home, and we called the doctor. She wanted me to swing by her office so she could check to see how far along I progressed. Only 2 centimeters, so she gave us the option of going back home or going to the hospital. We opted for home. Starting at 5:30 the contractions were coming every 5-10 minutes apart and they were pretty intense. At 7:30 Britt thought that we should head to the hospital. We were seen immediately but put in a holding room for monitoring for 2 hours before they officially admitted me into the hospital. I was still only 2 centimeters but in tons of pain. We got admitted around 10pm and walked to the birthing suite. I could barely walk at this point and had to stop several times. The epidural came around midnight and it was the biggest relief of my life. We rested all night and my water broke at exactly 5am. They gave me a small dose of pitocin to get the labor moving and by 11:21am, after 45 minutes of pushing, we had a beautiful 7 pound 15 ounce baby boy.
I have to admit we have a good baby on our hands. He loves to sleep, eat and he is so content. Even with a good baby we are tired, being on call for feedings every 3 hours, lots of dirty diapers, and lots of holding and talking to our sweet little man. He is so easy to fall in love with.
Here are our favorite pictures of Michael's first week on this earth......

Wide awake


He has hair!!! And already a little thinker.

My pom pom hat Mrs. Amy gave me.

Daddy kissing my long little toes.

My bear hat Aunt Beth made.

January 05, 2012
Ten Tiny Toes
Well Mr. Michael Raymond Guillory has made his grand entrance into this big beautiful world, we are beyond thrilled and madly in love!! He weighted in at 7lbs 15oz arriving January 4th at 11:21am.
We are all doing fabulous and can not wait to get home.

December 27, 2011
Still Here
We are still here and still with child. Only 10 more days till my due date but the little peanut does not seem like he is making an exit anytime soon. I do realize that could change within a day or so but nothing has happened so far. I promise to keep you guys posted, but my blogging will be at a minimum for the next few months. No new design projects will be happening around our house for a while.
More than likely we will have tons of pictures coming your way in the form of an adorable newborn or a lady that is pregnant forever!!!!

December 16, 2011
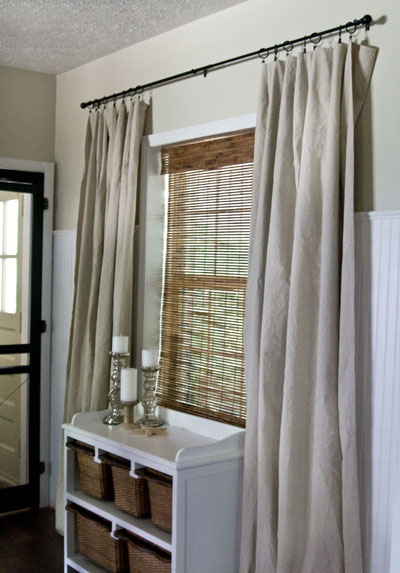
Michael's Nursery Tour
My sweet little baby boy will sleep and grow up in this room, and that makes my heart happy!! I have imagined for years what my son's nursery would look like - modern and vintage, colorful and light, playful and sophisticated. It would be a place for him to dream and grow!!!
I have poured lots of energy and time into making every detail just right. Fun enough for a kid but grown up enough that it would be an extension of our home. I wanted a room that was all his for a long time, not something that I would have to change after he becomes a little man. I didn't have a theme for the room, I just wanted things that I loved. It's very modest done on a tight budget but it's everything that I dreamed of. We are hoping to replace the old carpet by the time he starts crawling around, but that will be a project for later.
Enough talking, I will let these pictures tell the story.....


The changing table was a purchase from our Round Top trip last year. I paid a whopping $150 for the antique dresser, all I had to do was dust it off and line the drawers with contact paper.
The bookshelf has been around for years and we gave it a good sanding and painted it a BM color - Rockport Gray. The side table near the rocker is a cedar chest from my husband's grandmother, we painted the outside the same gray color as the bookshelf and left the inside cedar for more storage in the room.
The blue print that is framed in the bottom of the bookcase was free from this website. I just saved it on my computer and printed it on some thick white paper and found an old frame hanging around the house. I love this scripture verse "For I know the plans I have for you declares the Lord, plans to prosper you & not to harm you, plans to give you hope and a future." -Jeremiah 29:11. So fitting for a kids room and the little paper airplane in the print is so cute.
Sources:
Crib - Amazon; Jenny Lind in White
Chair - Ikea Jenny Lund, read about rocker here.
Fabric for Pillow on Chair - Interior Fabric (local shop)
Fabric for Bed Skirt - Joann's Fabric
Orange Aardvark - Amazon, Cordy Roy
Gray Owl - Pier One
Lion Print - Sarah Jane Studio
White Frames - Ikea
Zinc Letters - on shelf above changing table; Anthropologie
Animal Flash Cards - on shelf, Anthropologie
Wall Color Paint - Benjamin Moore OC-14 "Natural Cream" (trim in "White Dove")
Antique Airplane - Paul Michael's Store
Wall Color Paint - Benjamin Moore OC-14 "Natural Cream" (trim in "White Dove")
Antique Airplane - Paul Michael's Store
Antique Blue Truck - TJMaxx
Baskets for Toys - in bookcase, Ikea
Animal Photography - above the side table; Sharon Montrose
Curtains - Ikea
Floor Lamp - Lowes; Lamp Shade - Kirkland's
White shelves - Ikea (painted the trim color)
Animal Photography - above the side table; Sharon Montrose
Curtains - Ikea
Floor Lamp - Lowes; Lamp Shade - Kirkland's
White shelves - Ikea (painted the trim color)
Subscribe to:
Posts (Atom)