Showing posts with label Cooking. Show all posts

November 17, 2011

Peanut Butter Blossoms

I was told to bring deserts to our little Thanksgiving gathering, and since I am the cook I get to pick what goes in my oven next Thursday (yes Thanksgiving is only a week away). Sweets have become the vain of my existence throughout this pregnancy, so everyone will be lucky if half these cookies actually make it. Who can go wrong when you mix peanut butter and chocolate - perhaps two of my favorite ingredients.

And for the husbands favorite desert I might mix him up a batch of THESE to bring along with us to visit the family. But back to my little heavenly blossoms.........


Ingredients:
1/2 cup creamy peanut butter
1/2 cup packed brown sugar
2 tablespoons milk
1-3/4 cups all-purpose flour
1/2 teaspoon salt
1/2 cup shortening
1/2 cup sugar
1 egg
1 teaspoon vanilla extract
1 teaspoon baking soda

Extra sugar
48 milk chocolate chips


Pre-heat oven to 375 degrees. Remove wrappers from heresy kisses. Mix together all ingredients expect the heresy kisses and extra sugar for rolling cookie ball.

Shape dough into 1 inch balls, roll in sugar and place on ungreased cookie sheet. Bake 10-12 minutes or until lightly browned. Immediately press a chocolate into center of each cookie; cookie will crack around edges.

Let cool and enjoy!!!!


September 16, 2011

When Food Works

My dear friend has started a food blog, and it's amazing. She has inspired me many times to jump out of my comfort zone in trying new foods, not to mention her out of this world cooking abilities. I guarantee her recipes are A+ and I can not wait to hear all her reviews of the local eating holes we have around town.  

Check out one of her first post about the new restaurant Cochon that opened in River Ranch Thursday by Chef Donald Link. We just got back from lunch and it was beyond superb. Just looking at the menu makes my mouth water. I hope you follow her blog and become inspired like I have. Here is a little excerpt from her blog......


Today is as good of a day as any to start this new adventure and let the whole world into my life as a long time food lover and cook. Some call themselves “foodies”, but I don’t really like that word, a little too trendy…and what does that really mean? Not to knock those that love that term, I just prefer to say simply that I love good food and will cook just about anything. And I can get a little obsessive, like when looking for a piece of pork belly and ending up buying a 60 pound case! Anyone need a piece of pork belly? But it did make a knockout Porchetta…later on that one. Am I sure about opening up my “food life” for public scutiny…not really, but this is a passion that I am willing to share, Anyway, why not! Do what you love and love what you do…isn’t that on some t-shirt somewhere…


July 01, 2010

Table For Four


You better believe I am having tons of fun with some of our wonderful wedding gifts. I love dishes, and I love using them even more. I channeled my inner Eddie Ross last night and made the dinner table look all fancy and romantic. With our dinnertime being mostly in front of the TV it was nice to have fresh flowers and sit face to face with soft jazz music in the background.


I used an old discontinued Maya pattern by Noritake China for the accent dishes and mixed them with some new aqua/blue napkins from World Market. I got a fresh spring bouquet at the grocery store and put some pops of yellow mini roses for the centerpiece. We ate roasted chicken with a vegetable medley and parmesan risotto. Yummy!!


Who would have thought saving money and eating at home could be so much fun!!!


June 25, 2010

Deviled Eggos

I made a trip to the antique store on my way home yesterday and pickup an old milk glass devil egg tray. My man loves deviled eggs so last night we put my $10 purchase to good use right away. I wanted to share my recipe with you guys. It's from Tyler Florence but I like to add a little relish and substitute a little paprika for the salmon caviar for garnish.


Curried Deviled Eggs

6 eggs
3 tablespoon mayo
1/2 tablespoon Dijon mustard
1 tablespoon curry powder
1 teaspoon cayenne
1 teaspoon lemon juice
1/2 tablespoon relish
salt and pepper to taste
Paprika and chives for garnish

Boil eggs, let sit in hot water for 15 minutes then run under cold water. Peal egg shells and cut eggs in half lengthwise. Take out egg yolks and mix in a processor with mayo, mustard, curry, lemon juice, and relish. Salt and pepper to taste and fill the eggs with mixture. Garnish with paprika and chives.


Easy peasy and a favorite around my house!!!! We went to the farmers market on Saturday and I got two dozen fresh organic eggs. I love how yellow the egg yolks are!!!


April 05, 2010

Sugar Spice and Everything Nice

The organization fairy came to visit my spice cabinet!!!!

This was the typical scenario every time I opened the cabinet to find a specific spice jar: grab a chair to stand on, start unloading all the jars till I found the right one which inevitably always was the last jar all the way in the back. Then the task of stuffing every thing back in the cabinet before I could start cooking.

I got these wall mounted spice racks from Ikea and put them on the inside door of the cabinet. I got some cute labels from the craft store and filled the jars with my 12 most commonly used spices. I am a spice girl, I love my spices, having my spices organized makes me very happy!! I got a 3 tiered stand to fit inside the cabinet from Tar-Jay to put the other spice jars on, and some clear canisters for my sugar and flour.

I did take a before picture but I am just to embarrassed to show you, so your gonna have to trust me - it was a mess in here.


January 28, 2010

You Are What You Eat

Yesterday the Oprah show shed some much needed light on the truth of where our food comes from. In response I wanted to share with you a little excerpt from Tyler Florence's cookbook "Dinner at My Place." Warning: you will want to become organic after reading this post....My man Tyler Florence has done it again, captured and wooed me!! I received the cookbook as a christmas present from my future in-laws (how cool are they!!). I made his carrot cake for a football party last weekend and the crowd gave it two thumbs up. So many more great recipes in the book that I can not wait to try. Go get yourself a copy - it is well worth the money. No lie I have read this cookbook from cover to cover on a six hour drive back from Dallas. The second chapter is an awesome chicken recipe, but what caught my attention was how he explained so eloquently the difference between all these confusing food labels and what they actually mean.

(The information below is not my own its straight out of Tyler's book which can be found here.)

"All Natural - You know better than to eat a rubber chicken, right? That's basically what this label promises you - that this chicken is not rubber. The USDA prohibits the use of hormones in raising poultry and most preservatives. But besides that, the chicken can be injected with just about anything else - from salt-water solutions to seaweed extract - and still be called "all natural." These solutions up your salt intake, change the chicken's flavor, and end up costing you more because they add weight to the chicken."

"Free Range - Sounds good, right? Vivacious white hens freely roaming sunny, grassy fields with fluffy yellow chicks in tow. Not so much. The USDA allows this label for any chicken that is allowed some access to an outdoor space. Said chicken may never see that outdoor space, and this designation doesn't address what's out on that yard - the conditions, the food, or the cleanliness. So it's a good start, but free range isn't the be-all and end-all we used to think it was."

"Certified Organic - I know there are those of you out there who think that organic is some kind of Hippie thing. But get that out of your head and start paying attention to organics-because they're here to stay. The Organic Foods Production Act of 1990 set forth requirements for products labeled as "organic" that ensure your chicken has lived a life dictated by government-mandated standards. It will have been fed only pesticide and chemical-free feeds of grains and soybeans, not animal byproducts. It also will have lived a life free of antibiotics and medicines. But guess what? It probably wouldn't have needed those antibiotics because organic chickens generally live a life free of the stress and contamination that can make other chickens sick. And of course, all organic chickens are both free range and all natural. See how that works? Whenever I can, I will definitely choose certified organic over the other options."


I don't know about you but that has cleared up years of confusion on the question we all get stuck with at the grocery store "which one should I buy?" I feel like I have been lied to with what all these nutrition labels aren't telling me. Yes organic is more money but by golly I am worth it!!! I feel like a paid advertiser here but on the Oprah show they highlighted a documentary called Food Inc. I just purchased my copy on Amazon, they are running a special on it till Friday at midnight only $9.99, and you can watch it instantly by download. You think this little post has stirred up some truth on the food we buy wait till you see the documentary (I actually cried). So lean into this adventure of organics with me and take a stand for your body and your family!!! I am now gently stepping off my soap box now before I fall off.


December 18, 2009

Sopapilla Cheesecake

I know, I thought about licking the picture on my computer screen also, but trust me it does not taste good. This has become Britt's new favorite desert, and it's so easy to make I feel guilty. My man is a simple man. I have spent hours squeezing juice out of tiny little key limes to have enough to make a pie completely from scratch, but he would not even touch it. But mix some cream cheese in a box with sugar and dinner rolls and he is the happiest man alive. I love my simple man.
We had a Mexican theme party last weekend and I was called to make desert. I have lived in Mexico for a few years off and on and admit they are not know for their amazing deserts. So I hit the internet and found this recipe, and of course had to put my personal spin on it. I was very nervous about how it would turn out but it was a major hit, and I made it again last night for another party. The only thing I want to try is next time putting an egg in the cream cheese filling, I think it will add that last star to make it a 5 star desert. But for now here is the recipe.....


2 (8 oz) cans of original crescent rolls
2 (8 oz ) packages cream cheese
1 cup of sugar
1 teaspoon vanilla

1/2 stick butter, melted
1/4 cup brown sugar
1/4 cup white sugar
1 teaspoon cinnamon
honey

Preheat oven 350 degrees and grease 13x9 pan.

Mix cream cheese at room temperature, 1 cup sugar, and vanilla until smooth (be careful I burnt my hand mixer out trying to do this, make sure your cream cheese is soft)

Unroll one pack of dinner rolls and pinch the seams together, use a rolling pin to shape it into one 9x13 shape. Press into the bottom of the pan.

Spread the cream cheese filling evenly over the dough in the pan. Unroll remaining pack of crescent dough and shape the same way as other piece and cover the cream cheese filling.

With a pastry brush gently brush melted butter over the top layer of crescent dough.

In a small bowl mix white sugar, brown sugar, and cinnamon and spread evenly over entire dish.

Bake at 350 degrees for 35-45 minutes. After about 20 minutes check the dough and using your pastry brush spread the butter out to the sides of the dish. (I find that the butter tends to pool in the middle and does not allow to cook evenly). Bake until the dough has puffed up and turned a nice golden brown.

Right when you take it out of the oven drizzle the entire pan with honey.

Allow to cool completely before cutting into squares. If by some miracle you have any leftovers store in refrigerator, and those little squares are even amazingly tasty when cold.


December 02, 2009

Banana Nut Cupcakes

Art Smith was Oprah's personal chef for years, he is now the proud owner of Table 52 in Chicago. Going eat at his restaurant is on my "things to do before I kick the bucked list." He is on my top ten list of favorite chefs, and I have quite a few of his cookbooks. The recipe below is adapted from Art's Hummingbird Cake, I like to call it "Banana Nut Bread on Crack." I love cupcakes, so I have turned his cake recipe into cupcakes. I guess it makes me fill special to have my own personal little cake instead of a piece of someone else's cake. As a child I was never good at sharing, I guess my little flaw has followed me into adulthood. So yes, I turn many cake recipes into cupcakes for everyone. I like to make these the day before because they become moist, dense, and flavorful if you let them sit in the refrigerator overnight. They are still excellently amazing if you eat them right out the oven, but this is one of those recipes that is better the next day.
Banana Nut Cupcakes


Cake:
3 cups all-purpose flour
2 cups sugar
1 teaspoon baking soda
1 teaspoon cinnamon
1/2 teaspoon salt
2 cups chopped ripe bananas
8 ounce can (1 cup) of drained crushed pineapple
1 cup vegetable oil
2 large eggs, beaten
1 1/2 teaspoon vanilla extract
1 cup chopped pecans

Icing:
8 ounces cream cheese
1/2 cup (1 stick) butter
1 pound confectioners' sugar (about 4 1/2 cups)
1 teaspoon vanilla extract

This recipe will make about 18 cupcakes, so take you pans out and place 18 cupcake liners in each individual cup. Preheat oven to 350 degrees.

Sift all the dry ingredients into one large bowl (flour, sugar, baking soda, cinnamon and salt). In a different bowl, stir or whisk all the wet ingredients (bananas, pineapple, oil, eggs and vanilla) until they are combined. Do not use as electric mixer, you want small chunks of banana and pineapple in your mixture, not a glob of mush. Pour into the dry mixture and gently fold together with a large spatula just until smooth. After the dry and wet ingredients are combined, fold in the pecans. Spread evenly into the lined cupcake pans.
Bake until each cupcakes turns slightly golden brown on the top, this usually takes 20 to 30 minutes. Transfer the cupcakes to wire racks and let cool.

Now the best part of these little buggers - the icing. Use an electric mixer on high speed to mix the cream cheese and butter (it is easier to work with cheese and butter when both are at room temperature). On medium/low speed, gradually mix the confections sugar, once all the sugar is added then add the vanilla.

Spread a generous amount of icing on each cupcake. Store cupcakes uncovered in the refrigerator, and let stand at room temperature 1 hour before serving. Enjoy!!


November 18, 2009

Desert Lady

When I was young my cousins would call my grandmother the ice cream lady. They would come visit and she had a deep freezer in her kitchen filled with an array of ice cream. Vanilla, chocolate, mint, coconut, banana, you name it she had all 31 flavors. My grandfather and I were making milk shakes before milk shakes were cool. Anyway, I have become sorta the desert lady on Sunday Saints Day with Britt's friends. (FYI Britt, if you ever leave me I get custody of your friends.) I completely dropped the ball last Sunday and did not prepare a desert, we had nothing sweet to wash down that amazing gumbo - the travesty!!! So I am planning ahead this week and we are taking it to the polls for a vote. That's right you guys get to pick what I am making this week. Let me introduce you to the three finalist:

Paula Deen's Pumpkin Gingerbread Trifle: Remember its almost Thanksgiving and what better way to prepare yourself than PUMPKIN - did I mention this desert got 5 out of 5 stars from over 700 people on the Food Network!!! I could lick this picture.


Mar-a-Lago Key Lime Pie: News Flash - this is the same chef that created those out of this world turkey burgers that I cooked. Hint, Hint this will be equally amazing!!!


Red Velvet Cake Balls: I know I have been talking about making these suckers for a few weeks now and really been waiting for the weather to cool down (it makes a difference in the chocolate coating). My cousin ate so many of these he pooped red, while I know that story is not very appetizing it gets my point across - these are to die for.


So, no pressure but Please, PLEase, PLEASE vote even if you are not coming to the party, because I will blog the recipes and pictures of the desert I make before Thanksgiving!! If no one votes, no one gets desert and I mean it. Remember this is my world and their are no rules, you can vote as many times as computers you can find!!!


November 09, 2009

Granny's Sausage Bread

I promised all our friends that came to our little football party yesterday that I would share my granny's sausage bread recipe. (Let's pause for a second here and brag on our New Orleans Saints being undefeated at 8-0, whoopee!!) This is a special recipe in our family, so handle with care. We gonna do things a little different today, instead of me just listing the ingredients and a brief how to, you coming shopping with me. I love cooking, and I love talking about cooking so buckle up cause I got lots of pics for you.

Let's start with the most important ingredient for sausage bread: the bread. For years my grandparents had Schwan's delivery service and she would get this amazing dough to make the bread, but times are changing and we don't see Schwan's around this part of town much. So, in my best effort to not let this legacy die I went on a mission to find the next best thing to this miracle dough from Schwan's. And stop the press, we found a comparable ingredient in Bridgeford Ready-Dough. You can find it in the freezer section next to the frozen deserts at your favorite grocers (Alberston's). It comes in a pack of three, and yes we are making all three. Don't worry you don't have to eat all three in the same day. This is a great recipe for freezing, just wrap loaf in aluminum foil and you have super for a rainy day.


Anyway, once you find the ready-dough you are well on your way. Just set it out on the counter for a few hours to let it thaw out while you prepare the rest of the dish. Up next you will need 2 lbs of ground meat and 1 lb of pork sausage. With a mixture of onions, bell peppers and celery (I cheat sometimes and buy Guidry's creole onion mixture and mince half the container in a food processor - shhhh.)


Mix the ground meat, pork sasuage, minced onion mixture and simmer until the meat is brown. I have no idea how long this takes, just make sure the meat is cooked. This is the perfect time to add a little seasoning to your meat (shake the Tony's generously). I know raw meat does not look that appetizing but.....


Once the meat is browned, set it aside to cool.

Take out your knife cause its cuttin time. I use Velveeta cheese (because I am worth it) but you can use cheddar or a mixture of you favorite cheeses. Cut the cheese in cubes.


It's pepperoni time, and I always eat a few on the side!!! I like to cut my pepperoni in half. So go ahead and cut away.


Now that everything is prepped and ready it just a matter of putting it all together. Lay out three pieces of aluminum foil and spray with Pam, place the thawed bread on each piece of foil and flatten out. I spray my hands with the Pam to work with the bread cause it likes to stick to my hands. Once you have the bread ready, wash your greasy hands and start layering. First layer is the meat mixture, then a layer of pepperoni, then a layer of cheese.


After you finish layering your fat free, calorie free stuffing, pull the bread on each side over the stuffing and pinch the bread closed. Sorry I should have taken pics of this but my hands were preoccupied. Where is Britt when you need him? After your stuffing is completely encased in the bread, wrap the foil around bread. I made this recipe the night before the football party so I put 2 loaves in the refrigerator and let is rise over night. I put the third loaf in the freezer for when I lose 10 pounds or I get hungry for it again, which ever comes first.

So after the bread has risen all you have to do is bake it at 350 degrees for 30 minutes and BAM (as Emeril says) you got homemade sausage bread!!! It's that easy, and no Craig you don't have to have soul in you to bake that good.


Here is the list of ingredients for you shopping trip:

2 lbs. Ground Meat
1 lb Pork Sausage
Pack Ready-Dough Bread

Guidry's creole mixture
OR
1 Onion
1 Bell Pepper
1 stick Celery
2 gloves garlic

1 medium package of Velveta Cheese
Sliced Pepperoni
Aluminum foil


November 05, 2009

Kiss My Grits

What exactly is a grit? Growing up in the South grits have been a part of my life since before I can remember and it was often on our menu for breakfast. We had cheese grits, instant grits, grits with shrimp, yellow grits, white grits, etc., etc. But I really never thought about what's in a grit. So I google "grit" and find that they are small broken grains of corn. That does not sound very appetizing but mixed with heavy cream, and alot of butter they are amazingly delicious. Take it from a resturant that has put these little grains on their menu and made them famous. Zea's roasted corn grits are a must every time I dine at their restaurant. I found a few different recipes on the web but they were all missing a little something or had to much of something else. So after much trial and error, and many different taste testers (thanks guys!!), I have found what may be the closest thing to the real deal.

Zea's Roasted Corn Grits


2 cups water
2 cups heavy cream
1 cup yellow grits (not the instant kind)
4 ounces butter (1 stick)
1 cup roasted/grilled corn
1 teaspoon salt
1/4 cup green onion tops

To grill the corn you can do it the right way: 1- lightly butter corn on the cob and place on grill over open fire until corn is slightly blackened let cool and shuck corn off the cob. Or you can do it the easy way: 2- drain can of corn and roast in skillet with spoonful of butter until slightly blackened. Salt and pepper to taste.

To make the grits bring water to a boil. Add heavy cream and return to boil. Add grits, salt and butter and simmer for about 20 minutes (make sure you add salt here, if you cook the grits without salt it is very hard to get them salty after they are cooked). Turn off heat and stir in roasted corn and half of the onion tops, garnish with remaining onion tops.


October 07, 2009

Halloween is Almost Here!!

It's become sort of a tradition for Halloween that I make my Monsters and Mummy cupcakes, and my nephew is already asking about them. We only have a few weeks till the spooky night so I am getting my favorite ideas together, and of course I am sharing them with you.  


Sorry about the picture quality of the cupcakes, its a bad picture taken last year on my iphone, this year I promise to take better pictures. For the Cookie Monsters I used decorating tip #133 - grass tip with blue icing and stuffed 1/2 of a mini chocolate chip cookie in his mouth. We made lots of mummies for Payton's classmates and I used different colors (yellow, blue, red) for the eyes. The blood shot eye cupcake was a hit, I used a gummy eye ball from a bag of candy and had some red gel icing that I used to make them look blood shot. Finally the buried alive cupcakes I used Oreo cookies and put them in the food processor to make the dirt. In my bag of gummy body parts they had feet and hands that I stuck in the "dirt" to make them look buried alive. Also in the dirt I used the Pepperidge Farm Milano cookies and put RIP on the top part and stuck it in the cupcake for a coffin. Tons of fun!!!!

And it would not be Halloween without something gross on the menu. A great finger food is a cracker with cream cheese (I like to mix dill with the cream cheese) with sliced smoked salmon on top, make the salmon look likea piece of flesh on the cracker. Or that classic seafood mold you can shape into looking like a brain - yummy. Make finger sandwiches but instead of cutting into bit size triangles use a Halloween cookie cutter to shape the sandwiches into ghosts, bats, etc. Or buy a plastic skull at the store (clean it) turn it upside down and fill it with homemade spaghetti, everyone will think their eating brains. While your out getting the plastic skull pick up a little corpse put it into a dish (shaped like a coffin) cover with blue corn tortilla chips and blood red salsa on the side. And you can not forget bar-b-que chicken wings, just call them bat wings - the power of suggestion. Ok I think that's enough of the spooky sick food ideas. I will leave you with my new favorite idea for an ice chest this season from Southern Living.  


Pumpkin Cooler from Southern Living 

October 05, 2009

Cheese Drop Biscuits

This recipe was adapted from Art Smith, personal chef to Oprah and owner of Table 52 in Chicago. Very easy to make and absolutely amazing little biscuits. I am not a huge fan of goat cheese so I have stayed clear of this recipe for way to long. I kept hearing how awesome they were so I had to give it a try. The restaurant serves them before your meal as a bread appetizer in a cast iron pan brought piping hot right to your table. I made them Saturday night and not one little muffin is left. The ingredients are cheap and easy so I think I will make another batch tonight. I am going to try and mix some cheddar cheese with the parmesan to give it a little added taste. Maybe we can just call them cheese drop biscuits!!! 


Goat Cheese Drop Biscuits/Muffins


2 cups self-rising flour
1 teaspoon salt
4 tablespoon cold butter, plus extra to greese pan
2 tablespoons (2 ounces) shredded goat cheese
1 cup buttermilk
1/4 cup grated parmesan cheese
2 tablespoons mayonnaise

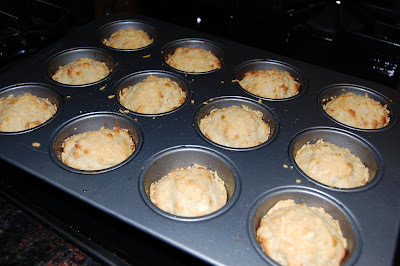
Preheat oven to 425 degrees. Here I used a muffin pan instead of a cast iron pot and placed it in the oven while it was heating up. The recipe will make about 12 muffins.


Mix flour and salt into a  bowl, then cut the cold butter into tiny pieces and mix with flour and mix in the shredded goat cheese. Slowly pour in the milk and mayonnaise. Stir until the mix is moistened. Remove the hot pan from the oven and place a dab of butter into each muffin cup. When the butter has melted, put batter into each cup and fill half way with the batter. Brush the top of the biscuits with the melted butter. 


Bake for 10 minutes, remove from the oven and sprinkle with the grated cheese. Bake 5 more minutes until browned on the top and bottom.


Enjoy warm!!!!

September 04, 2009

Cafe Roma Can Do No Wrong

I have no mouth watering picture of my new tuna recipe for you, and to be completely honest I have not even tried it in the confines of my kitchen. But believe you me I have eaten the dish many a nights. It's from a quaint little restaurant in River Ranch, and the dish was featured in the latest edition of our local "L" magazine. It's a herb and garlic marinated tuna served medium rare over cannellini beans and wilted spinach - I don't know about you but I am sold!!! And the recipe sounds pretty darn easy, so happy cooking (this one is for you Rachel).


Tuscan-seared Tuna

1 tablespoon oregano
1 tablespoon crushed red pepper
1 tablespoon garlic powder
1/2 tablespoon salt
2 cups olive oil, plus 2 teaspoons
4 (8-ounce) tuna steaks
3 cups northern beans
1 tablespoon minced garlic
Salt and pepper to taste
5 cups baby spinach
3 cups balsamic vinegar
1/4 cup sugar

Create a marinade by mixing the first four ingredients, plus 2 cups of olive oil. Place tuna steaks in the marinade and let sit for 15 minutes. While the tuna is marinating, add 2 teaspoons of olive oil to a skillet and saute the beans with 1 tablespoon minced garlic for 3 to 5 minutes. (If using canned beans, simply add the beans to skillet. If using raw beans, soak them overnight before adding them to this dish.) Add salt and pepper to taste. Add the spinach and cook until wilted. 
Sear the tuna in a little oil if cooked in a skillet or alone if cooked on a grill, about 3 to 4 minutes per side. 
Create the balsamic reduction by combining the balsamic vinegar and sugar. Place in pot and bring to a boil. Reduce heat and simmer until mixture has been reduced to a syrup-like consistency. Drizzle over tuna.

August 18, 2009

Winner Winner Chicken Dinner

Tyler Florence is one of my favorite chefs, he has amazing skills in the kitchen and his dishes are truly the "Ultimate" (he is also pretty easy on the eyes ladies). This is the first recipe I cooked with my new 5 quart non-stick Calphalon pot. I am total in love with my new pot!! I tried making his recipe healthy by using boneless chicken breast instead of a whole chicken, cutting out half of the butter, and using whole wheat penne pasta. This is one of my favorites so I hope you ENJOY!!


CHICKEN WITH MUSHROOMS AND MARSALA


6 pieces of boneless chicken breast
2 cloves of minced garlic
1/2 bunch fresh thyme
2 cups mushrooms cut in half
1/2 cup diced onions
1 1/2 cups marsala cooking wine
1 cup chicken broth
1/2 stick butter, cut into cubes
Extra-virgin olive oil
Salt and Pepper
1/2 bunch parsley, chopped
2 cups whole wheat penne pasta 

Season the chicken breast with salt and pepper. Add a dash of olive oil to the pan and brown chicken for about 10 minutes on both sides. Remove chicken from pan and set aside. To the pan, add garlic, thyme, onions and mushrooms, and saute until muchrooms are brown and onions are slightly caramelized. Add marsala wine and chicken broth to the pan. Take the chicken and put it back in the pan making sure each piece has good contact with the bottom of the pan. Dot the top of each chicken piece with butter and cook over low-medium heat for 30 minutes, basting the chicken with the pan juices periodically. When finish cooking add in the parsley and penne pasta. 

July 28, 2009

Cold Turkey

Last night we had a viewing of the season finale of the Bachelorette at Britt's house. Since all of our friends are training for the the Cajun Man Triathlon in September, I decided to go the healthy route and cook up some turkey burgers and baked sweet potato fries. You know me, only the best for our friends, and who knows better than the combination of Oprah and Donald Trump. Oprah found this new favorite food when she tried a turkey burger at Mar-a-Lago, Donald Trump's private club in Palm Beach. "I believe [it] may be the best turkey burger in the entire world," she says. Those same words have escaped the lips of everyone who has eaten this burger, or as Amy from Good-Bye 20's...Hello Botox! put it "I am so sad that my burger is gone." People I would not steer you wrong - TRY IT!!!

Mar-a-Lago Turkey Burger


1/4 cup onion tops
1/4 cup celery finely chopped
1/4 cup onions finely chopped
3 green apples, peeled and diced
1/8 cup canola oil
4 pounds ground turkey breast
2 tablespoons salt
1 tablespoon black pepper
2 teaspoons chipotle Tabasco
1 lemon, juice and grated zest
1/2 bunch parsley, finely chopped
1/4 cup Major Grey's Chutney, pureed

Saute onion tops, celery, onions and apples in the oil until tender. Set aside and let cool. Mix the turkey with sauteed items and the remaining ingredients. Shape the mixture into 8 burgers. A very important step here is to refrigerate the patties for a couple of hours so that the burgers become firm and do not fall apart. Place on grill and cook each side for about 10 minutes until the burger is thoroughly cooked. Serve with Mar-a-Lago pear chutney.


MAR-A-LAGO PEAR CHUTNEY

1 pear, peeled and diced
1/2 teaspoon cinnamon
1 teaspoon salt
1 1/2 cups Major Grey's Chutney

Preheat oven to 350 degrees. Mix all the ingredients above and bake for 10 minutes. Cool and serve with burgers.


Recipe adapted from Jeff O'Neill, executive chef, Mar-a-Lago Club